For a long, long time my one wire temp sensor that is connected to my Raspberry Pi and integrated to my Vera has shown identical value.
I was pretty sure some upgrade of the Raspberry Pi had broken it some how and after some evening of googling I found a way to see the temperature again:
Disable the device tree:
$ sudo raspi-config
Goto 8) Advanced -> A5) Device Tree and choose no.
Install the updater firmware updater:
$ sudo apt-get install rpi-update
Then update (don't forget to take backup etc, etc.) and reboot:
$ sudo rpi-update
$ sudo ldconfig
$ sudo reboot
to update your Rpi firmware
WARNING: This update bumps to rpi-4.0.y linux tree
Be aware there could be compatibility issues with some drivers
Discussion here:
https://www.raspberrypi.org/forums/viewtopic.php?f=29&t=113753
See and behold, the temperature is correct.
Showing posts with label Raspberry. Show all posts
Showing posts with label Raspberry. Show all posts
Wednesday, August 5, 2015
Saturday, September 13, 2014
Older Ubuntu upgrade fails with 404
Man was I stuck! My Raspberry Pi has been running nicely in a corner doing things what RPi's does best, like measuring temperature, taking pictures, shining the leds etc. I thought I should give it the traditional treatment "sudo apt-get update". But no, and no. It just answered with error 404.
So after sometime I understand that the friends at ubuntu is doing something to me pretty strange. Ubuntu move their files around, in some kind of house keeping attempt, on their servers so nobody should be able to simply any longer update their machines, since they belive they are too old, one day.
Even microsofts older un-supported OS's can often be upgraded with out poking in the registry.
Well, as always very little is impossible and all you have to do is edit your source list and good instructions are available on Ubuntus pages:
http://askubuntu.com/questions/91815/how-to-install-software-or-upgrade-from-old-unsupported-release
Latest M2M hardware
Some things has happened since first release of the Raspberry Pi board and I think the original RaspPi still is one of the most versatile, available, devices for decent bucks right now.
What you might like to check out is also the newly releases Raspberry Pi Model B+ that hosts 4 USB ports.
Something else that might attract to some of you is the more boosted up Raspberry spin of: Banana Pi where you get 1GB of RAM.
Last but not least is the Intel Edison that is now (almost) the SD card size but intel chip with integrated bluetooth 4.0 and Wifi.
The fact that also finally after years of waiting the latest iPhone 6 now also includes Bluetooth 4 AND NFC could make up for some nice implementations to control your home devices.
Wednesday, February 6, 2013
Home Genie. Your Raspberry Pie Z-wave home automation package
At http://sourceforge.net/projects/homegenie/ they presented home genie. This is a package that might really rock the HA, Smart Home market in it’s foundation. It’s a “Open Source Home Automation Server Project” that not only looks great. It’s also available directly for your favorite device the Raspberry Pie!
If my Micasaverdes Vera would need a replace some day this is something I would definitely look into.
Jump over there and support them! (So it will be fully supported the day I might test it)

Cubieboard
![cubieboard_top[1]](https://blogger.googleusercontent.com/img/b/R29vZ2xl/AVvXsEgYV6S1uI_epHsuqIUEy5O6zKVukmfHc17CVzVbn9ENerZGOeVACOKvEJVD0hc6ir-x4qqhn080QfU4ahjebKjp7eIy2hcnykCxO7cUUcGW90QekUWMgqN2R86-DQE4S1HLaEGeZMmZIA/s1600-h/cubieboard_top%25255B1%25255D%25255B2%25255D.jpg "cubieboard_top[1]")
Cubieboard is a new 49$ “developer board”. We all know that it means a sweet device to run your linux project on for a low cost. A herd of this will show up in the Raspberry Pie’s foot step. This one is a bit different and more powerful with 4GB memory and IR!.
A lot of details at http://linux-sunxi.org/Cubieboard like:
Specifications
SoC
A10 @ 1Ghz
DRAM
512MB / 1GB
DDR3 @ 480MHz
NAND
4GB
Features
Video
HDMI
Audio
3.5mm jack, HDMI
Network
10/100
Storage
µSD, SATA (+5v power)
USB (Host/OTG)
2 / 1
Other
IR
Thursday, January 10, 2013
Razberry, the best of two worlds.
Ever wonder how and what will happen if you combine your two favorite things, the z-wave home automation protocol that is certified for over 700 devices ready to be fitted to your home and the Raspeberry Pie, super-cheap, mini computer? No need to wonder any more. For only 49€ you will get the Z-wave board to your Raspberry Pie. Some lines of codes and you should be able to turn off the light from the other side of the world with your iPhone. Go check out the details on http://razberry.z-wave.me/buy.php

Raspberry Pie just got a descent friend
There is a lot of small computers this days but solid runs' cubox packs very good performance for it's size (and price).
http://www.solid-run.com/cubox

http://www.solid-run.com/cubox
Wednesday, September 26, 2012
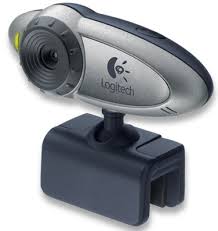
Raspberry Pi Logitech QuickCam Communicate STX USB cam P/N 861223 added to micasaverde Vera
Updated, based on new motion version. And it works a lot better now!
Lets hope I’m finally able to write a tutorial how I was able to add the Logitech QuickCam Communicate STX USB cam P/N 861223 to Raspberry PI and then also connect it so I can see the video in the micasaverde vera. If this looks easy it wasn’t at all. I have spent so much time testing so many software's without any good result. Some disclaimers that this is the way I got it to work, not stating that this is the way it should be done… But here it comes….
The instructions is based on the Debian Raspian “wheezy”
The camera must be plugged into a _powered_ usb hub. I also run the Pi from the same hub.
Install the software:
sudo apt-get install webcam v4l-conf
To find the value that should be in the input field in the .webcamrc file
v4l-info | grep name
name : "gspca_zc3xx"
name : "Brightness"
name : "Contrast"
name : "Gamma"
name : "Exposure"
name : "Gain, Automatic"
name : "Power Line Frequency"
name : "Sharpness"
Create the config file
sudo nano /home/pi/.webcamrc
[ftp]
host = localhost
user = pi
pass = password
dir = /var/www
file = webcam.jpg
tmp = imageup.jpg
local = 1
[grab]
device = /dev/video0
width = 640
height = 480
delay = 1
wait = 1
input = zc3xx
#norm = pal
quality = 50
trigger = 0
once = 1
For setups where the cam is on a different system than the Web server, you'd have to: Set the local value to 0 in the config file
sudo mkdir /var/www
Test it:
sudo webcam /home/pi/.webcamrc
Stop the webcam with Ctrl+C
Install the web server
sudo apt-get install apache2 &
Remove web server logging so it does not use all your disk by remarking the lines in:
sudo nano /etc/apache2/apache2.conf
#LogFormat "%v:%p %h %l %u %t \"%r\" %>s %O \"%{Referer}i\" \"%{User-Agent}i\""$
#LogFormat "%h %l %u %t \"%r\" %>s %O \"%{Referer}i\" \"%{User-Agent}i\"" combi$
#LogFormat "%h %l %u %t \"%r\" %>s %O" common
#LogFormat "%{Referer}i -> %U" referer
#LogFormat "%{User-agent}i" agent
sudo nano /etc/apache2/sites-available/default
# CustomLog ${APACHE_LOG_DIR}/access.log combined
Test the web server
http://x.x.x.x/webcam.jpg?Quality=Standard
Create a bash shell script to start it:
sudo nano /home/pi/cam.sh
#!/bin/bash
while ! sudo webcam /home/pi/.webcamrc >> /dev/null 2>&1 &
Change the file so it can be executed:
chmod 777 /home/pi/cam.sh
Run it:
sudo nohup /home/pi/cam.sh&
This time it runs in the background until you restart the Pi. Press ENTER to get your prompt back.
If you like the app to start every time you start the Pi
This will add the cam to the right run level
update-rc.d cam.sh defaults
Add the Panasonic camera plug in to Mios.com Vera and configure the URL field with webcam.jpg?Quality=Standard
First times it might not show the picture directly. Then I had to go to the settings tab and then back.
Saturday, September 15, 2012
Raspberry Pie USB Logitech QuickCam for Notebooks
I gave it my best and almost made it. Tried for 3 evenings to get the Logitech QuickCam for Notebooks to work with the Raspberry Pie.
Started with this distribution:
012-08-16-wheezy-raspbian.zip.torrent
Then got the camera connected to the Pi.
sudo apt-get update
sudo apt-get install motion
sudo apt-get install ffmpeg
then edited motion's config file
sudo nano /etc/motion/motion.conf
change these lines to "off" in that file:
control_localhost off
webcam_localhost off
mkdir /tmp/motion
Start up motion program:
sudo motion -n
then looked at http://1.1.1.1:8081 on the PC but the picture is very distorted.
By the way if you stop motion with Ctrl+C instead of Ctrl+X then you don’t have to find and kill the web-server all the time.
Good thing is that it seems to run without powered USB hub. Next camera…
Monday, July 16, 2012
Raspberry Pi XBMC installation
I finally got my Raspberry Pi and since the idea was to run the XBMC on it from the beginning I searched on the net for the best way to do the installation.
Found http://www.raspbmc.com that had a very easy way of doing it. But one thing that happened during the installation is that the Raspberry Pi restarts and then the screen goes black. I did the mistake several time to cold start it at this point but you should just wait for a long time. It took some 15-20 minutes for me and then the installation is read!
Another thing I have noticed is that you seem to be little bit limited with the USB devices. If you hook on too much devices you lose e.g the mouse.
The general experience is really good!
Subscribe to:
Posts (Atom)